Westinghouse 7247400 Installation Guide
Browse online or download Installation Guide for Household fans Westinghouse 7247400. Westinghouse 7247400 Installation Guide User Manual
- Page / 17
- Table of contents
- BOOKMARKS
Summary of Contents
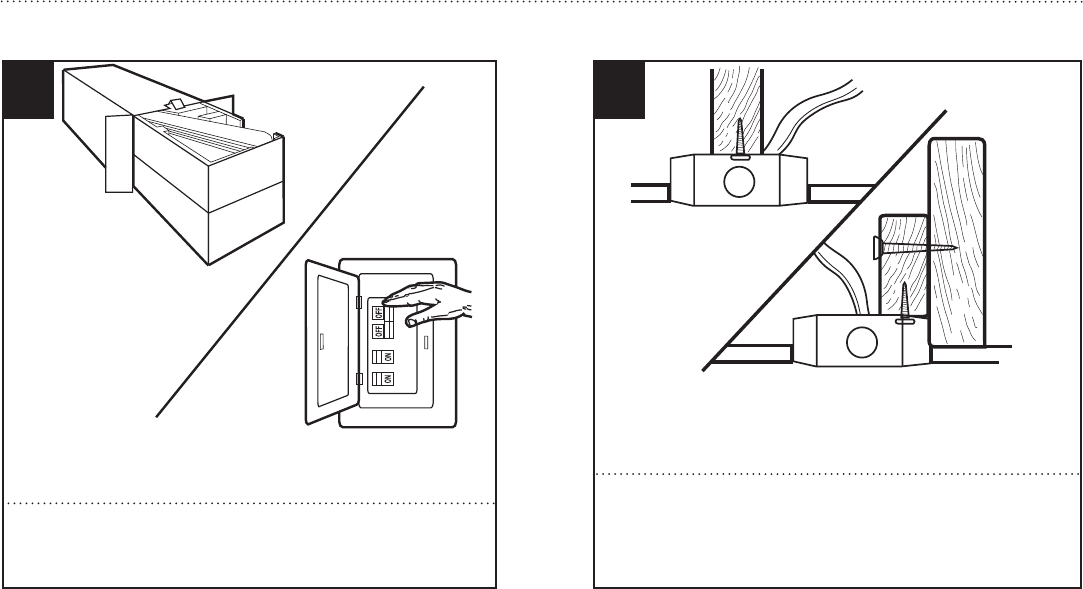
6ETL-ES-Lavada-WH12Unpack and inspect fan carefully to be certain all contents are included. Turn off power at fuse box to avoid possible electrical s
15ETL-ES-Lavada-WH12SECURE TO CEILINGASEGURE EL VENTILADOR AL CIELORRASOLoosen the 2 screws on the bottom of mounting bracket. (do not remove) Raise t
16ETL-ES-Lavada-WH1217The inside canopy cover ring (1) has two keyhole slots that allow it to be mounted onto the screw heads on the two protruding sc
17ETL-ES-Lavada-WH12Remove one of the screws (1) on the mounting plate (3), and loosen, (do not remove) the other two (2).Quite uno de los tornillos (
18ETL-ES-Lavada-WH12LIGHT FIXTURE INSTALLATIONINSTALACIÓN DEL ARTEFACTO LUMINOSOAttach the lower motor housing onto the mounting plate (1), by placin
19ETL-ES-Lavada-WH12LIGHT FIXTURE INSTALLATIONINSTALACIÓN DEL ARTEFACTO LUMINOSOConnect the 9-pin connector from the motor to the one from switch hous
20ETL-ES-Lavada-WH12LIGHT FIXTURE INSTALLATIONINSTALACIÓN DEL ARTEFACTO LUMINOSOConnect the two single wire plugs from the switch housing (1) to the t
21ETL-ES-Lavada-WH12Install halogen bulb by snapping into place. (Caution: do not touch halogen bulb with bare hands.)CAUTION : Risk of fire. Use only
22ETL-ES-Lavada-WH12Assemble decorative fob and extension chains from hardware bag to fan pull chains by inserting end of chain into chain coupling.
7ETL-ES-Lavada-WH12Instale el soporte de montaje a la caja de embutir del cielorraso con la tornillería suministrada con la caja de embutir. MOUNTING
8ETL-ES-Lavada-WH126Place downrod assembly into canopy (1), canopy cover ring (2) and coupling cover (3). Feed motor wires though the downrod assembl
9ETL-ES-Lavada-WH12NORMAL DOWNROD OPTIONOPCIÓN CON VARILLA VERTICAL PARA CIELORRASO NORMAL7Loosen set screws (5) in downrod coupling (4). Insert downr
10ETL-ES-Lavada-WH12Loosen downrod ball (1) from downrod (2) by removing set screw (3).Afloje la esfera de la varilla vertical (1) de la varilla verti
11ETL-ES-Lavada-WH12Re-install pin into extended downrod, and slide downrod ball up to the top of the downrod. Re-install set screw to secure ball to
12ETL-ES-Lavada-WH12Attach blade assembly to motor using the screws. Tighten screws securely.Fije el conjunto de las paletas al motor usando los torni
13ETL-ES-Lavada-WH12MOUNTINGMONTAJE13Carefully lift fan assembly onto mounting bracket. Rotate fan until notch on downrod ball (1) engages the ridge o
14ETL-ES-Lavada-WH12WIRING OPTIONSOPCIÓN DE CABLEADO15Follow diagram above to make wiring connections for wall control operation.14Follow diagram abov
Related products and manuals for Household fans Westinghouse 7247400

 (2 pages)
 (18 pages)
© 2020, manymanuals.com. All rights reserved. | 1.000 s |
 Manymanuals.com
 Manymanuals.de
 Manymanuals.fr
 Manymanuals.it
 Manymanuals.pl
 Manymanuals.cz
 Manymanuals.es
 Manymanuals-pt.com
Comments to this Manuals