Westinghouse 7247500 Installation Guide
Browse online or download Installation Guide for Unknown Westinghouse 7247500. Westinghouse 7247500 Installation Guide User Manual
- Page / 12
- Table of contents
- BOOKMARKS
- PREPARING FOR INSTALLATION 1
- ANTES DE LA INSTALACIÓN 1
- MOUNTING BRACKET INSTALLATION 2
- Choose a MOUNTING OPTION 3
- Elija una OPCIÓN DE MONTAJE 3
- NORMAL DOWNROD OPTION 4
- EXTENDED DOWNROD OPTION 5
- MOUNTING 7
- WIRING OPTIONS 8
- OPCIÓN DE CABLEADO 8
- SECURE TO CEILING 9
- BLADE INSTALLATION 10
- INSTALACIÓN DE LAS PALETAS 10
- LIGHT FIXTURE INSTALLATION 11
- ETL-ES-Roundabout-WH12 12
Summary of Contents
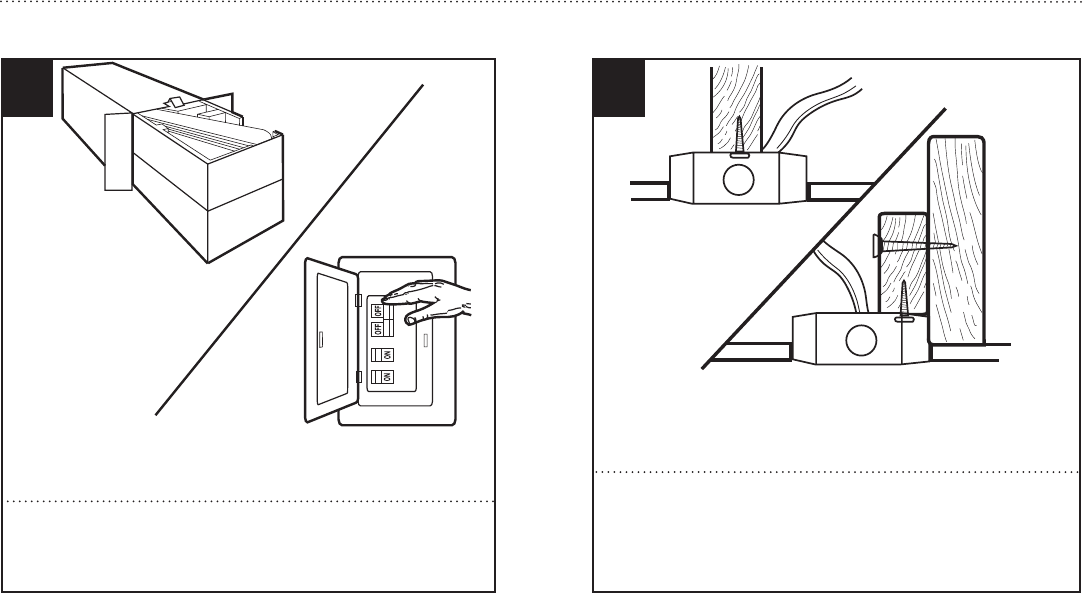
6ETL-ES-Roundabout-WH12Unpack and inspect fan carefully to be certain all contents are included. Turn off power at fuse box to avoid possible electric
15ETL-ES-Roundabout-WH12A.B.Attach blade assembly to motor using the screws and washers provided. Tighten screwssecurely.Fije el conjunto de las palet
16ETL-ES-Roundabout-WH12LIGHT FIXTURE INSTALLATIONINSTALACIÓN DEL ARTEFACTO LUMINOSO1819 12Install light bulbs.Instale las bombillas de luz.Locate the
17ETL-ES-Roundabout-WH1220Assemble decorative fob and extension chains from hardware bag to fan pull chains by inserting end of chain into chain coup
7ETL-ES-Roundabout-WH12Remove the screws from the two mating holes (1) on the canopy. Loosen (do not remove) the screws in the mating slots (2) on the
8ETL-ES-Roundabout-WH12MOUNTING BRACKET INSTALLATIONINSTALACIÓN CON SOPORTE DE MONTAJEInstall mounting bracket to outlet box in ceiling using the scre
9ETL-ES-Roundabout-WH12213NORMAL DOWNROD OPTIONOPCIÓN CON VARILLA VERTICAL PARA CIELORRASO NORMAL12346 7Place downrod assembly (1) into canopy (2) and
10ETL-ES-Roundabout-WH128Loosen downrod ball (1) from downrod (2) by removing set screw (3).Afloje la esfera de la varilla vertical (1) de la varilla
11ETL-ES-Roundabout-WH12Re-install pin into extended downrod, and slide downrod ball up to the top of the downrod. Re-install set screw to secure bal
12ETL-ES-Roundabout-WH12MOUNTINGMONTAJE12With bracket holding fan assembly, make electrical connections using the following step for wiring instructio
13ETL-ES-Roundabout-WH12WIRING OPTIONSOPCIÓN DE CABLEADO14Follow diagram above to make wiring connections for wall control operation.13Follow diagram
14ETL-ES-Roundabout-WH12SECURE TO CEILINGASEGURE EL VENTILADOR AL CIELORRASO15The canopy has two mating slots (1) and two mating holes (2). Position b
Related products and manuals for Unknown Westinghouse 7247500

 (4 pages)
 (2 pages)
 (12 pages)
© 2020, manymanuals.com. All rights reserved. | 3.722 s |
 Manymanuals.com
 Manymanuals.de
 Manymanuals.fr
 Manymanuals.it
 Manymanuals.pl
 Manymanuals.cz
 Manymanuals.es
 Manymanuals-pt.com
Comments to this Manuals